If you're attempting this migration, feel free to ask questions and provide feedback via the PostHog Communty Slack workspace or a GitHub issue.
Requirements
- An existing PostHog instance running at least
1.30.0(For upgrade instructions, take a look at this guide) - A new project on PostHog Cloud
Approach
This migration has two parts:
- Migrate your events, this will also create the necessary person, person distinct ID, and related records.
- Migrate your metadata (projects, dashboards, insights, actions, cohorts, feature flags, experiments, annotations).
Migrate your events
To migrate your events, we'll be using the PostHog Replicator app, which allows us to stream both incoming and historical events to PostHog Cloud
Note: Before starting, make sure to deactivate the GeoIP plugin on Cloud
Installing the Replicator
Start by logging in to your existing self-hosted instance and navigating to the 'Apps' tab. Next, search for the 'Replicator' app and install it if it isn't already.
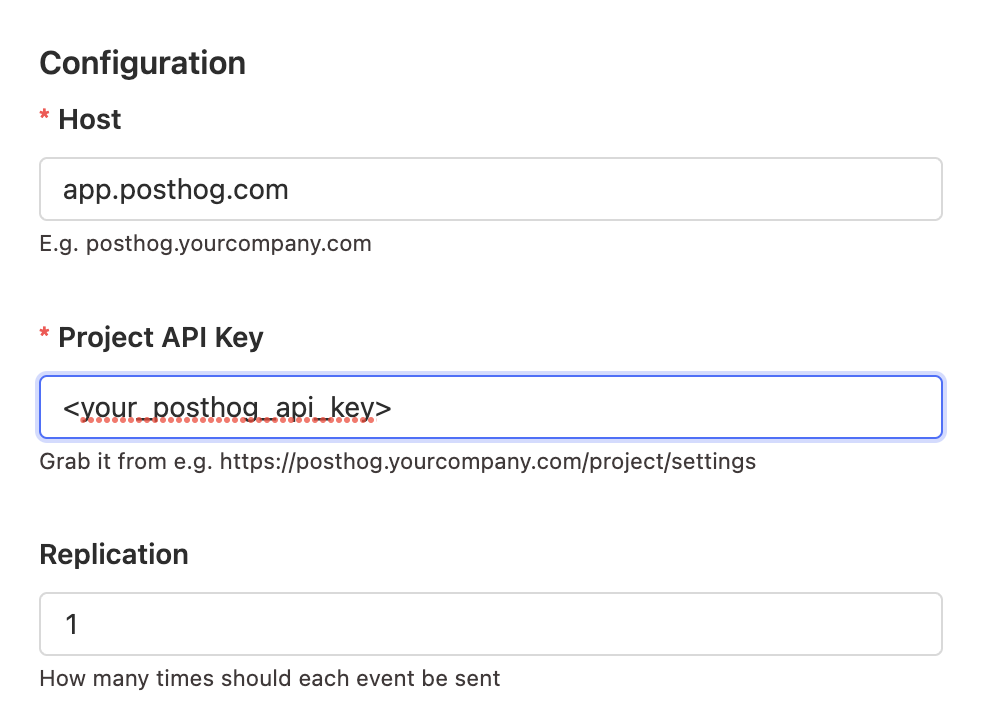
For the configuration:
- Host: either app.posthog.com for US or eu.posthog.com for EU
- Project API Key: the API key for the project in Cloud
After clicking save and activating it (toggle on the left side), the Replicator will begin forwarding incoming events to Cloud. Note that it may take around 15-20 minutes for the first events to arrive.
Exporting historical events
Now that the Replicator is sending new events, we'll set up a batch job to export past events. First, go back to the configuration menu and click the gear next to "Export historical events" under "Jobs", which will open the following popup.
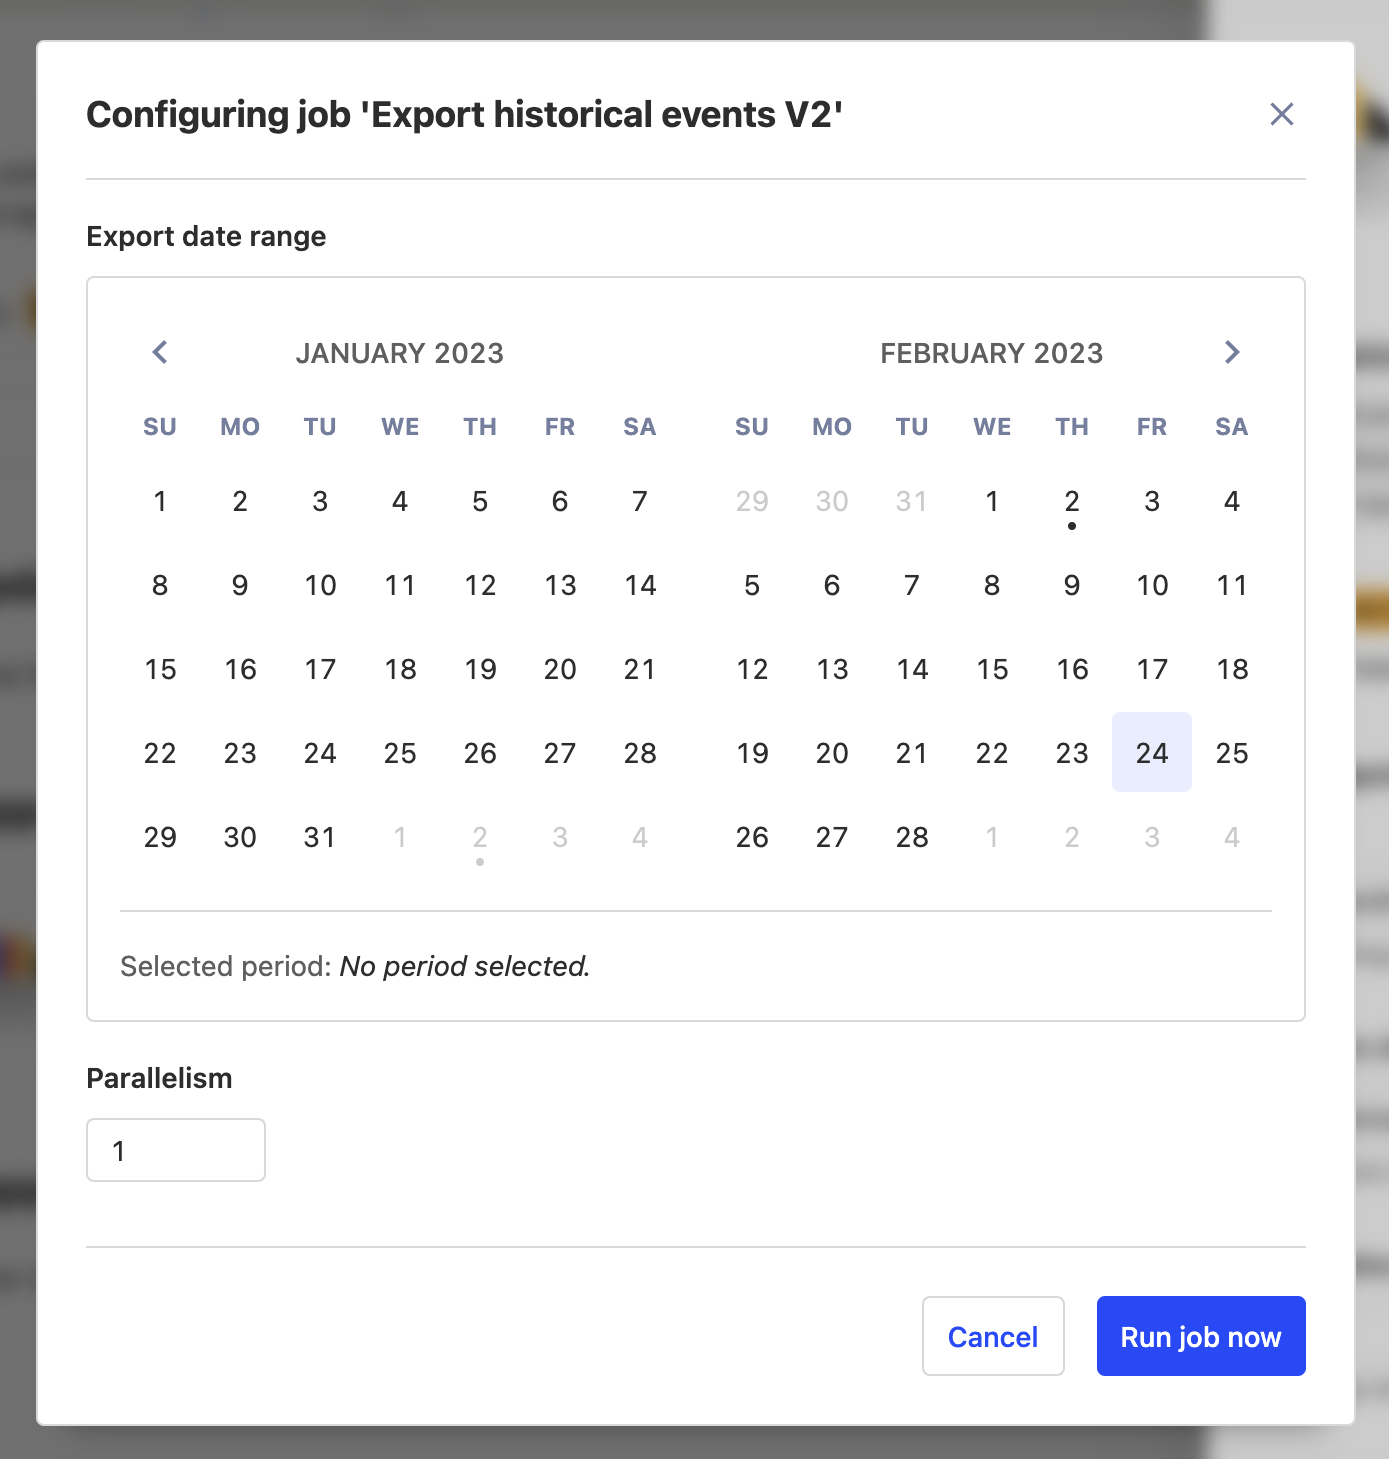
Select a start and end date on the calendar for the range you would like to export. Once you've chosen a date range, click "Run job now" to start the export.
Depending on the amount of data you have stored, this may take a fair amount of time. You can monitor the progress by clicking the "App metrics" button (graph) and going to the "Historical exports" tab.
Switching tracking in you product
Now that our export is running, the next step is to switch over tracking within your product to direct any new events to Cloud. First, ensure that the Replicator app is still running on your self-hosted instance. Next, begin swapping out the API key and host within all the areas of your product that you track. Since we still have the replicator app installed, any events sent to the old instance will be forwarded, while any events using the new API key will go directly to our Cloud instance.
Once this is complete and you've double-checked that no more events are coming to the old instance and that all historical exports have finished, you can deactivate the Replicator app.
Migrate your metadata
Follow the instructions on the PostHog migrate metadata repo:
Note This process has the following caveats:
- Project API Key. You'll need to replace the API key in your code with the new API key.
- "created by" information. Every object will appear as if it was created by you.
- "created at" information. Every object will appear as if it was created on the time you ran this script.
- Clone the repo and cd into itTerminalgit clone https://github.com/PostHog/posthog-migrate-metacd posthog-migrate-meta
- Install the dependencies by running
yarn - Run the scriptTerminalts-node --source [posthog instance you want to migrate from] --sourcekey [personal api key for that instance] --destination [posthog instance you want to migrate to.] --destinationkey [personal api key for destination instance]
For more information on the options see the repo's readme
Migrating your custom apps
If the app was previously extracting events using the scheduled tasks api:
- (fastest option) you could move this logic from the app into scheduled tasks on your server potentially using a cron job
- If you can make your app generalizable enough that others can benefit then submit your app to the store.
- To make it generalizable you'll want to convert anything specific to your configuration into a plugin.json config value
If the app was transforming events before ingestion:
- (fastest option) you could move this logic from the app into your client before you send the event
- If you can make your app generalizable enough that others can benefit then submit your app to the store.
- To make it generalizable you'll want to convert anything specific to your configuration into a plugin.json config value
If the app was used to send events to a custom destination:
(fastest option) Convert your app to work as a webhook. We are soon releasing a webhook destination. You can subscribe for updates on the roadmap
If you can make your app generalizable enough that others can benefit then submit your app to the store.
- To make it generalizable you'll want to convert anything specific to your configuration into a plugin.json config value
If the options above don't work and you were previously paying a substantial amount self-hosting then email us at hey@posthog.com with a link to the public github repo and we can see if it's appropriate as a private cloud app.