Objective
Integrating PostHog into your website using Google Tag Manager.
Why is this useful?
Google Tag Manager helps you add tags into your website in a codeless way, for services such as marketing and analytics tools.
It is an easy way to integrate PostHog into your website without having to update your codebase.
Prerequisites
To follow this tutorial along, you should:
- Have deployed PostHog or be using PostHog Cloud.
Step-by-step instructions
Get your PostHog snippet from your 'Project Settings' or the initial PostHog setup
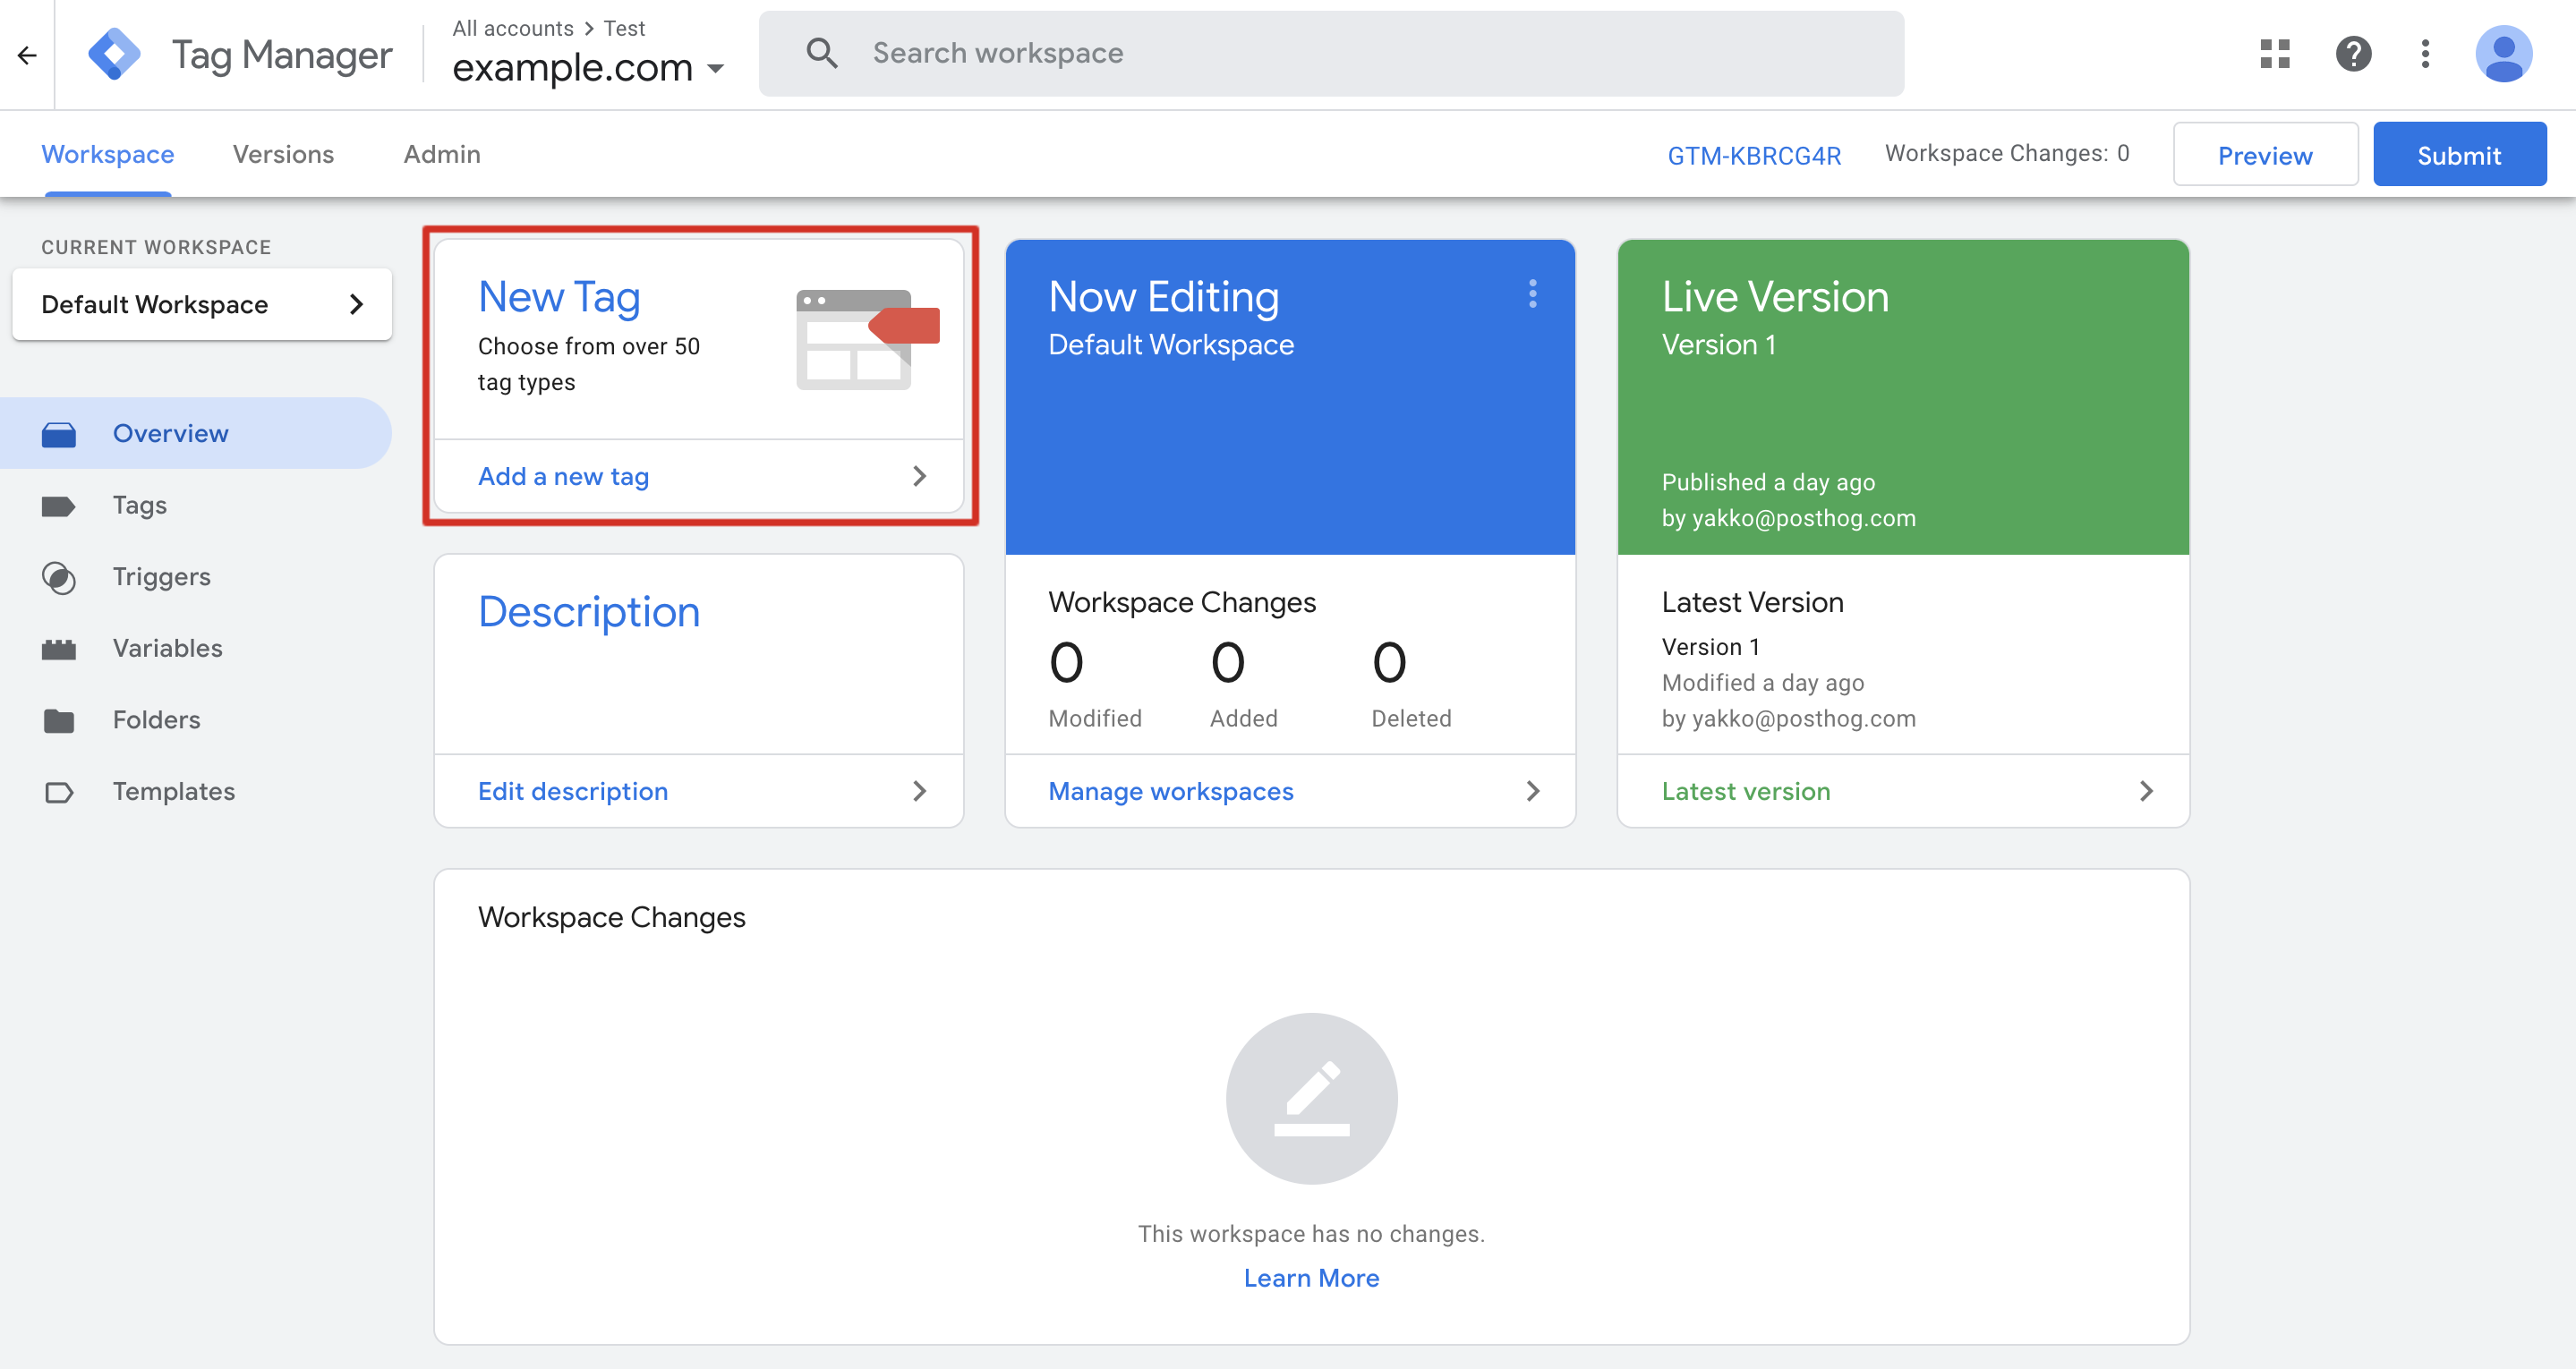
Access your Google Tag Manager dashboard and navigate to the desired account/container that is integrated with the website you want to add PostHog tracking to
Click to add a new tag:
On the page to configure a new tag, add your PostHog snippet as a 'Custom HTML Tag' under 'Tag Configuration'
For the trigger, select the default "All Pages - Page View" trigger and then click 'Save' on the top right corner of the drawer
Back on the main dashboard, click 'Submit' to update your website with the new PostHog tag
You're done! PostHog is now configured for your website.
To confirm PostHog is configured correctly, visit your website and then check if the events from your session appear in PostHog. Note that this may take a few minutes.